 |
 |
 |
 |
 |
|
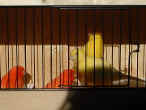
Fife
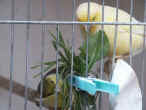
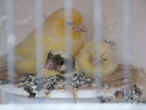
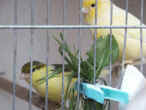
pair enjoying dandelion leaves |
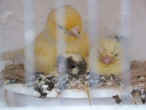
Buff
Hen + Chicks |
Buff
Fife Canary with Chicks
|
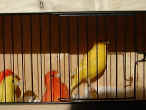
Variag.cock
+ Buff Hen
|
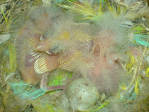
Chicks
approx 6 days |
HISTORY OF THE CANARY (by Alan Pennington)
- The Canary was first discovered by the Spanish, when they conquered the
Canary Islands towards the end of the fifteenth century.
- They then introduced them into Europe selling only cock birds at
first
- for their song and at a high price
- Only the wealthy people could afford to purchase them.
- By the Seventeenth century the Italians and English had succeeded in
breaking the Spanish monopoly on females
- How they succeeded in doing this, remains a mystery even today.
- From this beginning various breeds of canary have been developed
- Today there must be at least 20 or so different breeds.
- They can be split into three groups
1. Type Canaries
- These are bred "Exhibition-wise" for their shape,
size, position etc.
- These Breeds include the Border, Yorkshire, Fife, Gloster and
Irish to name a but a few.
2.
Song Canaries
- These birds are bred just for their song.
- Contests are held where the birds are judged on their song and
points awarded for various notes
i.e. tours and rolls.
- These Breeds include the Roller Canary and other Continental varieties.
3. Colour Canaries
- These are bred just for colour and can be anything from Clear
reds to Opals plus other colours too numerous
to mention.
Canaries come in all shapes & sizes
- From the larger breeds such as Borders, Norwich, Crests and Yorkshires
- To the smaller ones - Fifes, Lizards, Irish and Rollers, to
name but a few.
- Normally the smaller varieties are easier to breed
- If starting-up, the Beginner would be advised to commence with this type
before progressing
onto the larger ones.
^
Top
Rest of Info
via BJH > >
FIFE CANARIES
- These are lovely, neat canaries around the size
Border Canaries used to be many years ago when
my Grandfather used to keep
them
- Since then Border Canaries have become a lot bigger
in size and substance.
TYPE and CONFORMATION
- A good Fife is about the size of a sparrow (maybe
slightly smaller)
- and it will be pert,
- sit upright on a perch - not slouched down onto
it.
- have a neat shape,
- with a round head shaped like a marble,
- clean beak and eyes and look alert,
- with good definition of feather shape and
colour.
- If it's variegated it should have equal variegations
to either side of it's body, as near as poss.
a bit like a mirror image.
(this is for showing purposes)
- It should have Tight healthy feathers
- - not loose and fluffy
- The Buff (paler lemon colour, has a
"harder" type of feather
- The Yellow (a deeper colour yellow) is a
"softer" type of feather
- So, it follows when you pair up that putting a
Buff to a Buff will produce feather that is too coarse and hard - to the
eye
- Yellow to yellow would produce a feather quality
that is too soft and fluffy
- So the ideal pairing would be a Buff to a Yellow
to produce the optimum type of feather.
- The yellow also produces better coloured chicks
- One compensates the other.
- You then have to decide if you want to Breed Clears
(either yellows or buffs)
- i.e. birds that are self-coloured with no dark
markings
- or variegated - those that have dark markings
over the yellow
- (see
pictures above which show a clear
Buff Hen with a Yellow variegated cockbird)
- The wings tips should meet down the back of the bird
- like an inverted "V"!
- They shouldn't cross over
- Neither should they sit apart
- i.e. no gap between the wings down the birds
back
- They should be held firmly together
- The above are just the basics required for a good
quality Fife Canary.
DIET
- They thrive on Mixed Canary Seed of a good clean quality,
- that doesn't have too much black rape in it -
- this they seem to disregard, so it's wasted.
- I am sure some seed manufacturers just seem to use it to bulk out the
bags of seed.
- they do prefer the Red Rape seed.
- It also contains linseed, which has a high oil content,
- Hemp which is high in protein and therefore good during the
breeding season.
- Plain canary seed, which is high in carbohydrate but a good
all-round seed.
- I tend to add extra Plain canary to my seed mix, as it seems rather
lacking in the Manufacturers mix.
- I often give them Budgie Tonic seed instead of Mixed Canary as
it also has groats in it, which they love.
- They also like a few (not many) small sunflower seeds.
- They will eat Millet sprays but not as keenly as Budgies do.
WILD FOODS
- Canaries love Wild Foods:
- Dandelion Leaves & the Ripe Brown Seeds later when the flower has
died and formed a tight seed container with the fluffy head - just
before it opens into the Dandelion Clock.
- Ripe Rats Tails (Greater Plantain)
- Shepherd Purse
- Chick weed
- Ripe Dock Seed
- Seeding heads of Hay Grass - just before the Farmer cuts it for Hay
- Fresh spring grass - just pull it for them (NOT LAWN CLIPPINGS
from a lawn mower,as they can start to ferment)
- CARROTS - they love them - stab them onto a pin nail on a
perch.
- All vegetables that a Rabbit would eat.
DURING THE BREEDING SEASON (Click here to go to a page on how to bring your Canary into Breeding condition)
- Leading up to the Breeding Season the Protein levels in the diet will
be "upped"
- This helps the bird come into Breeding condition
- They benefit from Blue Maw Seed, Teazle, Niger added to the Egg
Food or Seed mix
- + wild seeds and dandelion leaves etc.,
- + Egg Food until the hens lay
- Once the Hens lay just a basic seed mix with mainly plain canary,
as they are just on maintenance diet while they incubate the eggs
- Once the chicks are due to hatch then you can feed a more varied seed
mix again
- + the Egg Food (changed 3 - 4 times per day) for the parents to feed
the chicks with.
- Cuttlefish and Oystersell + mineralised Grit are essential to
aid digestion and maintain the calcium levels required for the formation
of the egg shell.
- The Canary will help itself to however much it requires - so free
access is essential.
- I also put in a pink Iodine nibbles block as this also contains
extra minerals as well as the iodine,
- which is essential in budgies and desirable for Canaries at
Breeding time.
BREEDING
- Canaries will build a nest in any receptacle in a Mixed Aviary, as soon as
they feel they are ready
to breed.
- So, it is probably better to either allow them to chose their own partners
and catch them up into Breeding cages
- or decide well in advance, which pairs you want to go together for
colour, type and feather etc.
- Put them into a Breeding cage that is partitioned off, at first (if
they haven't been together before)
- This is to introduce them (safely)
- Then open the back part of the partition about 1/4" so that they
can just see each other.
- If there is no aggression then you can open the partition a little
more or replace it with a
cage-front type of partition.
- Once the cock starts to sing and display at the hen and feed her thru
the bars
- You can let them in together.
- Provide a nest pan with a Nest felt either stuck to the bottom or
Zip-tied thru the ventilation holes in the bottom of the nest pan.
- If you don't they will pull it out and re-organise it - or pull it to
shreds to make their own Nest.
- It is also wise to follow the instructions on the
Red
Mite page (>>A comprehensive page of
info on the Life and death of Red Mite)
- Ensure that you put some sort of Red
mite deterrent under the nest Felt.
- If Red Mite get into a nest of chicks
it can cause havoc and even kill them as they are bloodsuckers and
only come out of crevices at night - so more often than
not you don't even know you have them!!
^
Top
- Hang the Nest pan at the back of the cage - not in direct sun - and about
4 - 5" from the top of the cage.
- They like to be in a discreet area - out of view.
- You need to provide Nesting material.
- You can either buy it from Pet shops
- or "make" your own :
- i.e. Moss, clean combings off your
short-haired
dog or horse's body hair (not the horses mane-hair or sheeps' wool - this would be too strong and
could wrap round the chicks legs or necks
and kill them or maim
them.
- Wash whatever you have decided to use in a seive,
- then put it in the microwave for approx. 1 minute
- - this steralises it and kills any bugs or eggs left in it.
- You can either buy special Nesting material holders, which look like
small barrel-shaped
plastic cages (11/2" x 2 1/2")
which fixes on the inside of the cage bars
- You then fill it with nesting material and they can pull it out thru
the spaces.
- or just push the nesting materials thru the cage bars.
- The act of pulling & collecting the nesting material helps to
bring the hen into Breeding Condition.
- You will know if your Hen is ready for Breeding becos she will carry
the nesting material,
she has collected, well back in her beak.
- They will then make the nest.
- It's usually thicker to the front of the Nest pan.
- Within 2 weeks of them being put together they will usually lay their first
egg.
- You need to remove this egg (very carefully) and put it
somewhere safe
- Use a box that has been sectioned off into compartments
- Put a little cotton-wool in each compartment to cushion the egg
- Keep it somewhere safe, COOL, but not Cold!
- This is so that the egg lies dormant until you put it back into
the nest.
- If you keep it too warm, the embryo will start to develop.
- The Canary hen lays every day - usually 4 eggs
- Remove the first 3 eggs and store (as above)
- Put a Dummy Egg (you can buy these at Pet Stores) in the nest
in it's place, as you remove
each egg.
- On the 4th day - put these 3 eggs back as the 4th egg should
have been laid
- All the chicks will then hatch out together.
- As they grow very quickly and can be almost feathered at 14
days,
- the 3 day gap would mean a big difference in chick size
- and the youngest almost always gets left out at feeding time or
crushed
- as it's bigger siblings fight for food.
- INCUBATION :
Hatch 14 DAYS (After you put all the eggs back)
- EYES Open : start
slitting around 7 days
- FLEDGE : 21 Days +/-
- CLOSE RINGNG : once the eyes are
about 1/2 open 8-9 days - but read the info
below under
"Split rings" before going ahead with close ringing.
- The other
problem with Close ringing besides what I have outlined
below, under Split Rings,
is that some canary parents won't accept their chicks with
rings on their legs and regard the Rings
as foreign objects.
- They often
end up throwing the chicks out of the nest while trying to
get the rings off their
legs or can actually kill them - is it really worth the
risk? The choice is yours!
- If Close
ringing is not really necessary for Showing etc., Split
ringing once they have left the nest is the
much safer
option for identification purposes only.
- Split Ring : Best to ring after they come out of the nest, as once you disturb a canary chick that
is in the nest it becomes like a "Spring-loaded Furby" and keeps
leaping out of the nest even tho
it's not ready to come out.
- this is a
recipe for disaster, as once they have been out once they
keep leaping out and then they become chilled.
- If you don't
touch the chicks, they actually clamp tightly down into the
nest pan if you go near them but once they have been out
once, they go the exact opposite way and keep leaping out!
- they then
don't beg for food as their metabolism slows down, as does
their digestive system and if not rescued by either human or
canary parent - they will die!
^
Top
|
